Create a new Erply Account
Creating Erply account step by step:
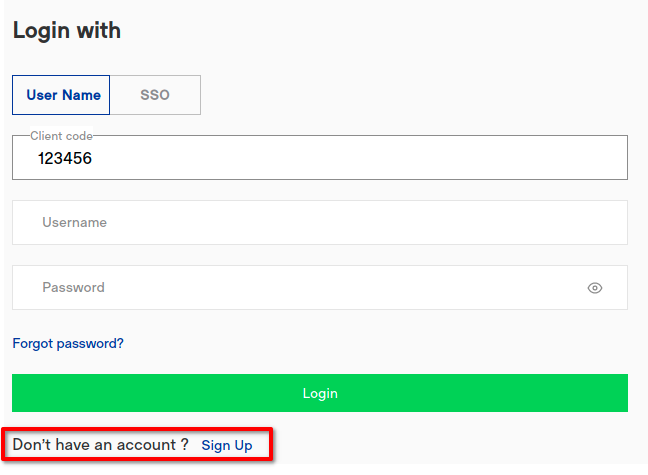
- Go to https://login.erply.com/
- Click “Sign Up”
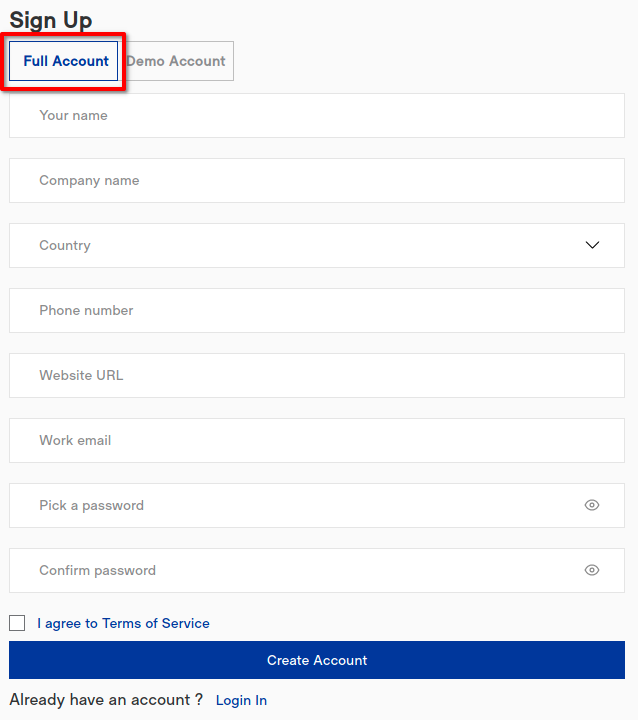
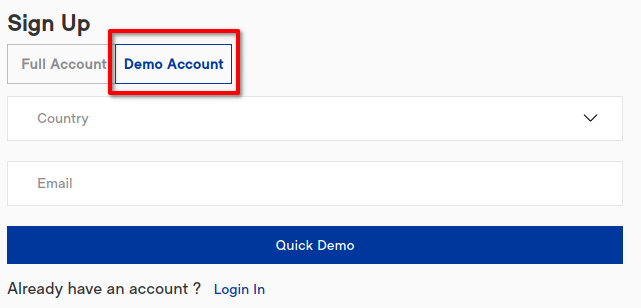
- A page will open where you can create a new account. You can select either "Full Account" or "Demo account". There are different example products/customers/customer groups, etc. in the demo account. The demo account also has limited time access.
- If you want to create a “Full Account”, a registration form will open where all blanks must be filled and then click “Create account”.
- If you want to create a “Demo Account”, a registration form will open where you must select a country and enter your e-mail address and then “Quick Demo”. A confirmation letter will be sent to your e-mail with customer code, username and password.
- The account has now been created and can be accessed at https://login.erply.com/.
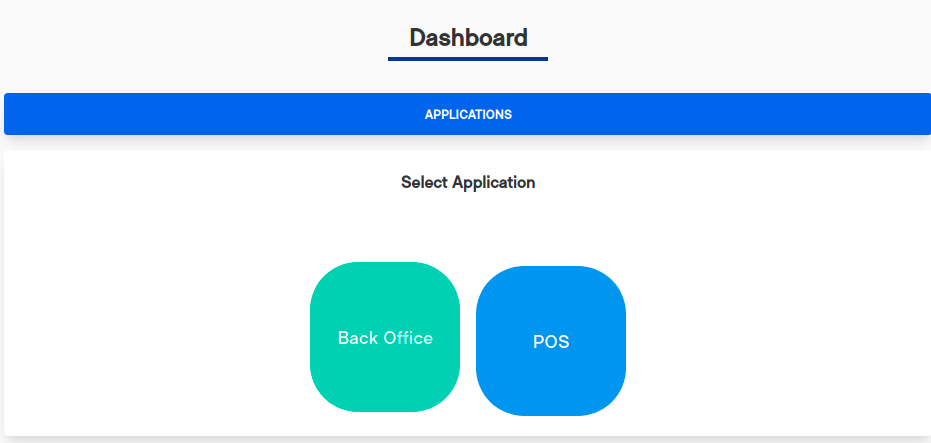
- When you log in, dashboard opens with: "Back Office" and "POS". BO is a warehouse module and POS is a cash register system. Click on the icon you want to enter.
Related Articles
How to Manually Sync or Resync Erply Documents to Xero
eXconnect enables manual sync of documents from erply berlin back-office. Enable Backoffice sync plugin Part A: Activating the Manual Sync Plugin in Erply Login to your Erply Backoffice account. Navigate to Settings from the main menu. Click on ...Setting Up eXconnect: Sync Your Erply Data with Xero Seamlessly
Connect eXconnect & Xero The below chart explains a high level flow between the two systems: Overview Before you connect your account please read our ‘Before you Integrate with Xero’ article. Connecting eXconnect to your Xero account is a powerful ...Before You Integrate: Key Steps for Connecting Erply with Xero via eXconnect
Before You Integrate Erply with Xero This guide outlines essential preparations and key considerations to ensure a smooth and successful integration between your Erply and Xero accounts using eXconnect. Taking these steps beforehand can save you time ...ERPLY and Xero Overpayment document
ERPLY to Xero Overpayment processing: Create invoice in ERPLY: *Select Customer and update the information on the invoice. *Select the location to invoice for. *Select products and add to the invoice with the quantity. Press confirm the Invoice to ...Sync a purchase order by 'status' from Erply to Xero
This article provides step-by-step instructions for syncing purchase orders (POs) by their status from Erply to Xero using the eXconnect integration. By choosing specific PO statuses, you can control which documents are transferred, ensuring your ...